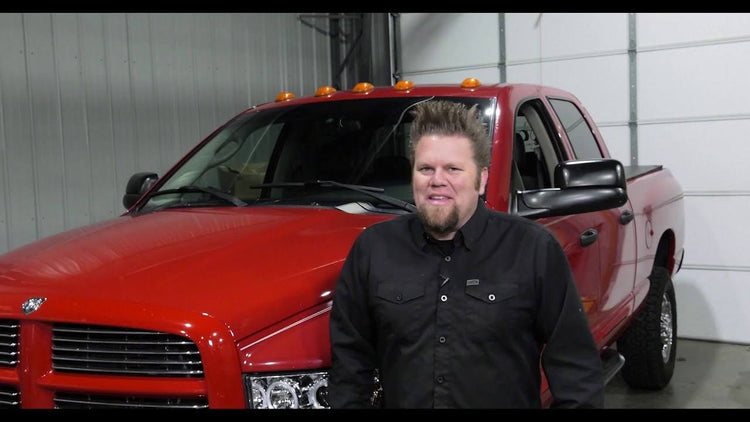
Ian "Big Tire" Johnson Spin Free Installation Video
Yukon Spin Free KitsFreewheeling in the Name of Fun and Efficiency Ian Johnson, the host of the TV show “Four Wheeler” on the MotorTrend Network, runs through all the details involved in installing a Spin Free Kit in the accompanying video. The four-wheel-drive systems on some Dodge and Jeep applications are engineered to turn the front axles and transfer case gears when the vehicles are in two-wheel drive mode. This is wasteful on two fronts. First is the wear and tear factor… which is complicated by the fact that these systems feature non-serviceable, failure-prone bearing assemblies. Then there’s the negative impact all the energy used turning the front drivetrain has on fuel economy. Yukon Spin Free Kits swoop in like a superhero to save the day by allowing the front drivetrain to freewheel. These kits replace the failure susceptible and expensive factory unit bearings with serviceable tapered bearings and races. The result is not only a design which is easier and more economical to maintain, but one that offers significant increases in fuel efficiency because mpg-stealing parasitic drag in the front drivetrain is reduced. Each Spin Free Kit includes new wheel hubs, spindles, high-strength Yukon 4340 chromoly outer axles, Yukon Hardcore premium locking hubs, high-quality bearings and seals, and all the hardware needed for installation. Kits are accompanied by a limited lifetime warranty against manufacturing defects for as long as you own the vehicle. Wasted effort is frustrating. Unnecessary wear and tear and costly repairs are frustrating. Sacrificing fuel efficiency is frustrating. Yukon Gear & Axle Spin Free Kits relieves the frustration and makes your rig less expensive to maintain while allowing it to run longer between fill-ups. It’s a win-win. About Ian Johnson A former high school auto shop teacher, Ian first hit the big time in 2005 as part of Spike TV’s Powerblock weekend programming. Ian co-hosted the popular “Extreme 4x4,” a hardcore how-to show that highlighted the building and modifying of off-road vehicles. After the Powerblock was cancelled in 2013, the show transitioned to Xtreme Off Road (XRO) on Paramount’s Power Nation programming block. Ian left XRO in 2017. He appeared briefly on “Big Tire Garage” before manning the helm of the highly successful “Four Wheeler” show when it debuted in 2019. Like his TV segments, this installation video goes full-tech as Ian highlights all the critical steps with enthusiasm and depth as only he can do. With his big hair and big fabrications skills, Ian is a well-known personality in the off-road industry. Check it out.

Unboxing: Gear & Install Kit Package
Part of our Yukon Gear & Axle product unboxing series.

Yukon At SEMA 2021
As the industry spools back up to fever pitch we are happy to back at the SEMA Show in force. We’ve spent the week in Sin City reconnecting with customers, inviting new friends to ‘Run With The Bear,’ and promoting the off-road lifestyle any way we can. Click the link below to experience the SEMA Show yourself through interviews with industry insiders conducted by TV personality Ian Johnson. View Our SEMA Coverage

Yukon Adventure Trek 2021
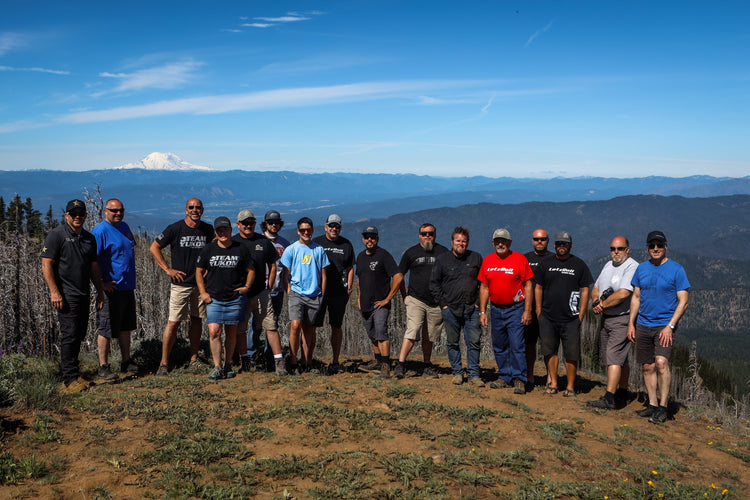
In January, a conversation with John Herrick from CRAWL Magazine started us thinking about a multi-day trail run to build content for the magazine. We weren’t sure where or when, but knew this could be fun. In February, the idea spread in the pits at King of the Hammers. Drivers were interested, and we knew we needed to get out on the trails as COVID-19 continued to hinder many events. By March, we had a group of motivated drivers and it was time to pull the trigger and establish dates and locations. Yukon Gear & Axle’s headquarters are in Everett, Washington, just north of Seattle. The trail system in the Pacific Northwest is ripe for adventure, and only two of the groups chosen to ride had been here before. John Herrick knew respected wheelers in the Mount Rainier area who had run the Washington Backcountry Discovery Route. Although originally developed for motorcycles, there was enough room for four-wheelers, and the idea had legs. We decided to go June 22 to 25 and run three stages of the route. With participants from Tennessee, Los Angeles, Park City, Reno, and the Seattle area, the Yukon Adventure Trek was on. Thank you to Mickey Thompson Tires The Cast of Players When the word got out, our friends from Mickey Thompson Tires asked if they could join us as the new Baja Boss A/T tires were rolling out. This became a great proving-ground run, and all participants were provided a set. John Herrick – CRAWL Magazine Ian Johnson – Big Tire Garage John Matthews – Auburn Car Repair & Off Road Nic Ashby – Rockstar Garage Andrew McLaughlin – Letz Roll Offroad Dustin Sexton – Sexton Offroad Yukon Gear & Axle team Day One: The Roll-In Day one started in Packwood, Washington, a small outdoor community in the Mount Rainier National Forest. Getting there is half the fun, and participants traveled from across the country to make it happen. Packwood, Washington, the first leg of the Yukon Adventure Trek No good story is complete without a little drama. Despite lodging challenges, the group made the most of the night, sharing food, stories, and preparing for the days ahead. Day Two: Packwood to Ellensburg The day began with fresh baked goods and a strategy meeting. The route covered 122 miles, climbing to 6,200 feet with incredible views of Mount Rainier and Mount Adams. Despite a flat tire and a shock issue, the group reached Ellensburg with teamwork and resourcefulness. The start of the Yukon Adventure Trek Thanks to quick repairs and local support, everyone was ready for day three. Day Three: Ellensburg to Cashmere Ian Johnson admiring Table Mountain and Lion Rock Lookout This shorter day featured high elevations, narrow ridgelines, and breathtaking views of the Central Cascade Mountains. Lunch at Beehive Reservoir offered wildlife sightings and a refreshing break. #elmo feeling the heat Despite rising temperatures and minor mechanical challenges, the group rolled into Cashmere and later enjoyed the Bavarian charm of Leavenworth. Day Four: Cashmere to Wapato (Lake Chelan) Chumstick Peak after wildfire damage The climb to Chumstick Peak revealed a dramatic landscape shaped by wildfire. After team photos and a long descent, the group continued toward Chelan Ridge. Exploring Chelan Ridge The descent toward Lake Chelan was challenging but rewarding. Popsicles from the Dometic cooler were a welcome treat before heading to Wapato. The final night featured a catered meal, lake time, and stories shared among friends at a rented home on Lake Chelan. Day Five: Roll Out The final morning marked departures for travelers heading back across the country. Conversations had already turned toward planning the next Yukon Adventure Trek. Rolling into Chelan, what a fun trip Thanks again to Mickey Thompson Tires and Wheels, CRAWL Magazine, Sexton Offroad, Letz Roll Offroad, Auburn Car Repair & Off Road, Big Tire Garage, and Rockstar Performance Garage.
